How to Propagate Alocasia Polly – If you’re looking to add some green to your indoor garden, propagating Alocasia Polly is an easy way to start today. Not only will it give you more plants to enjoy, but it can also be a fun and rewarding experience. In this article, we’ll provide you with a step-by-step guide on how to propagate Alocasia Polly at home.
Understanding Alocasia Polly Plant Propagation
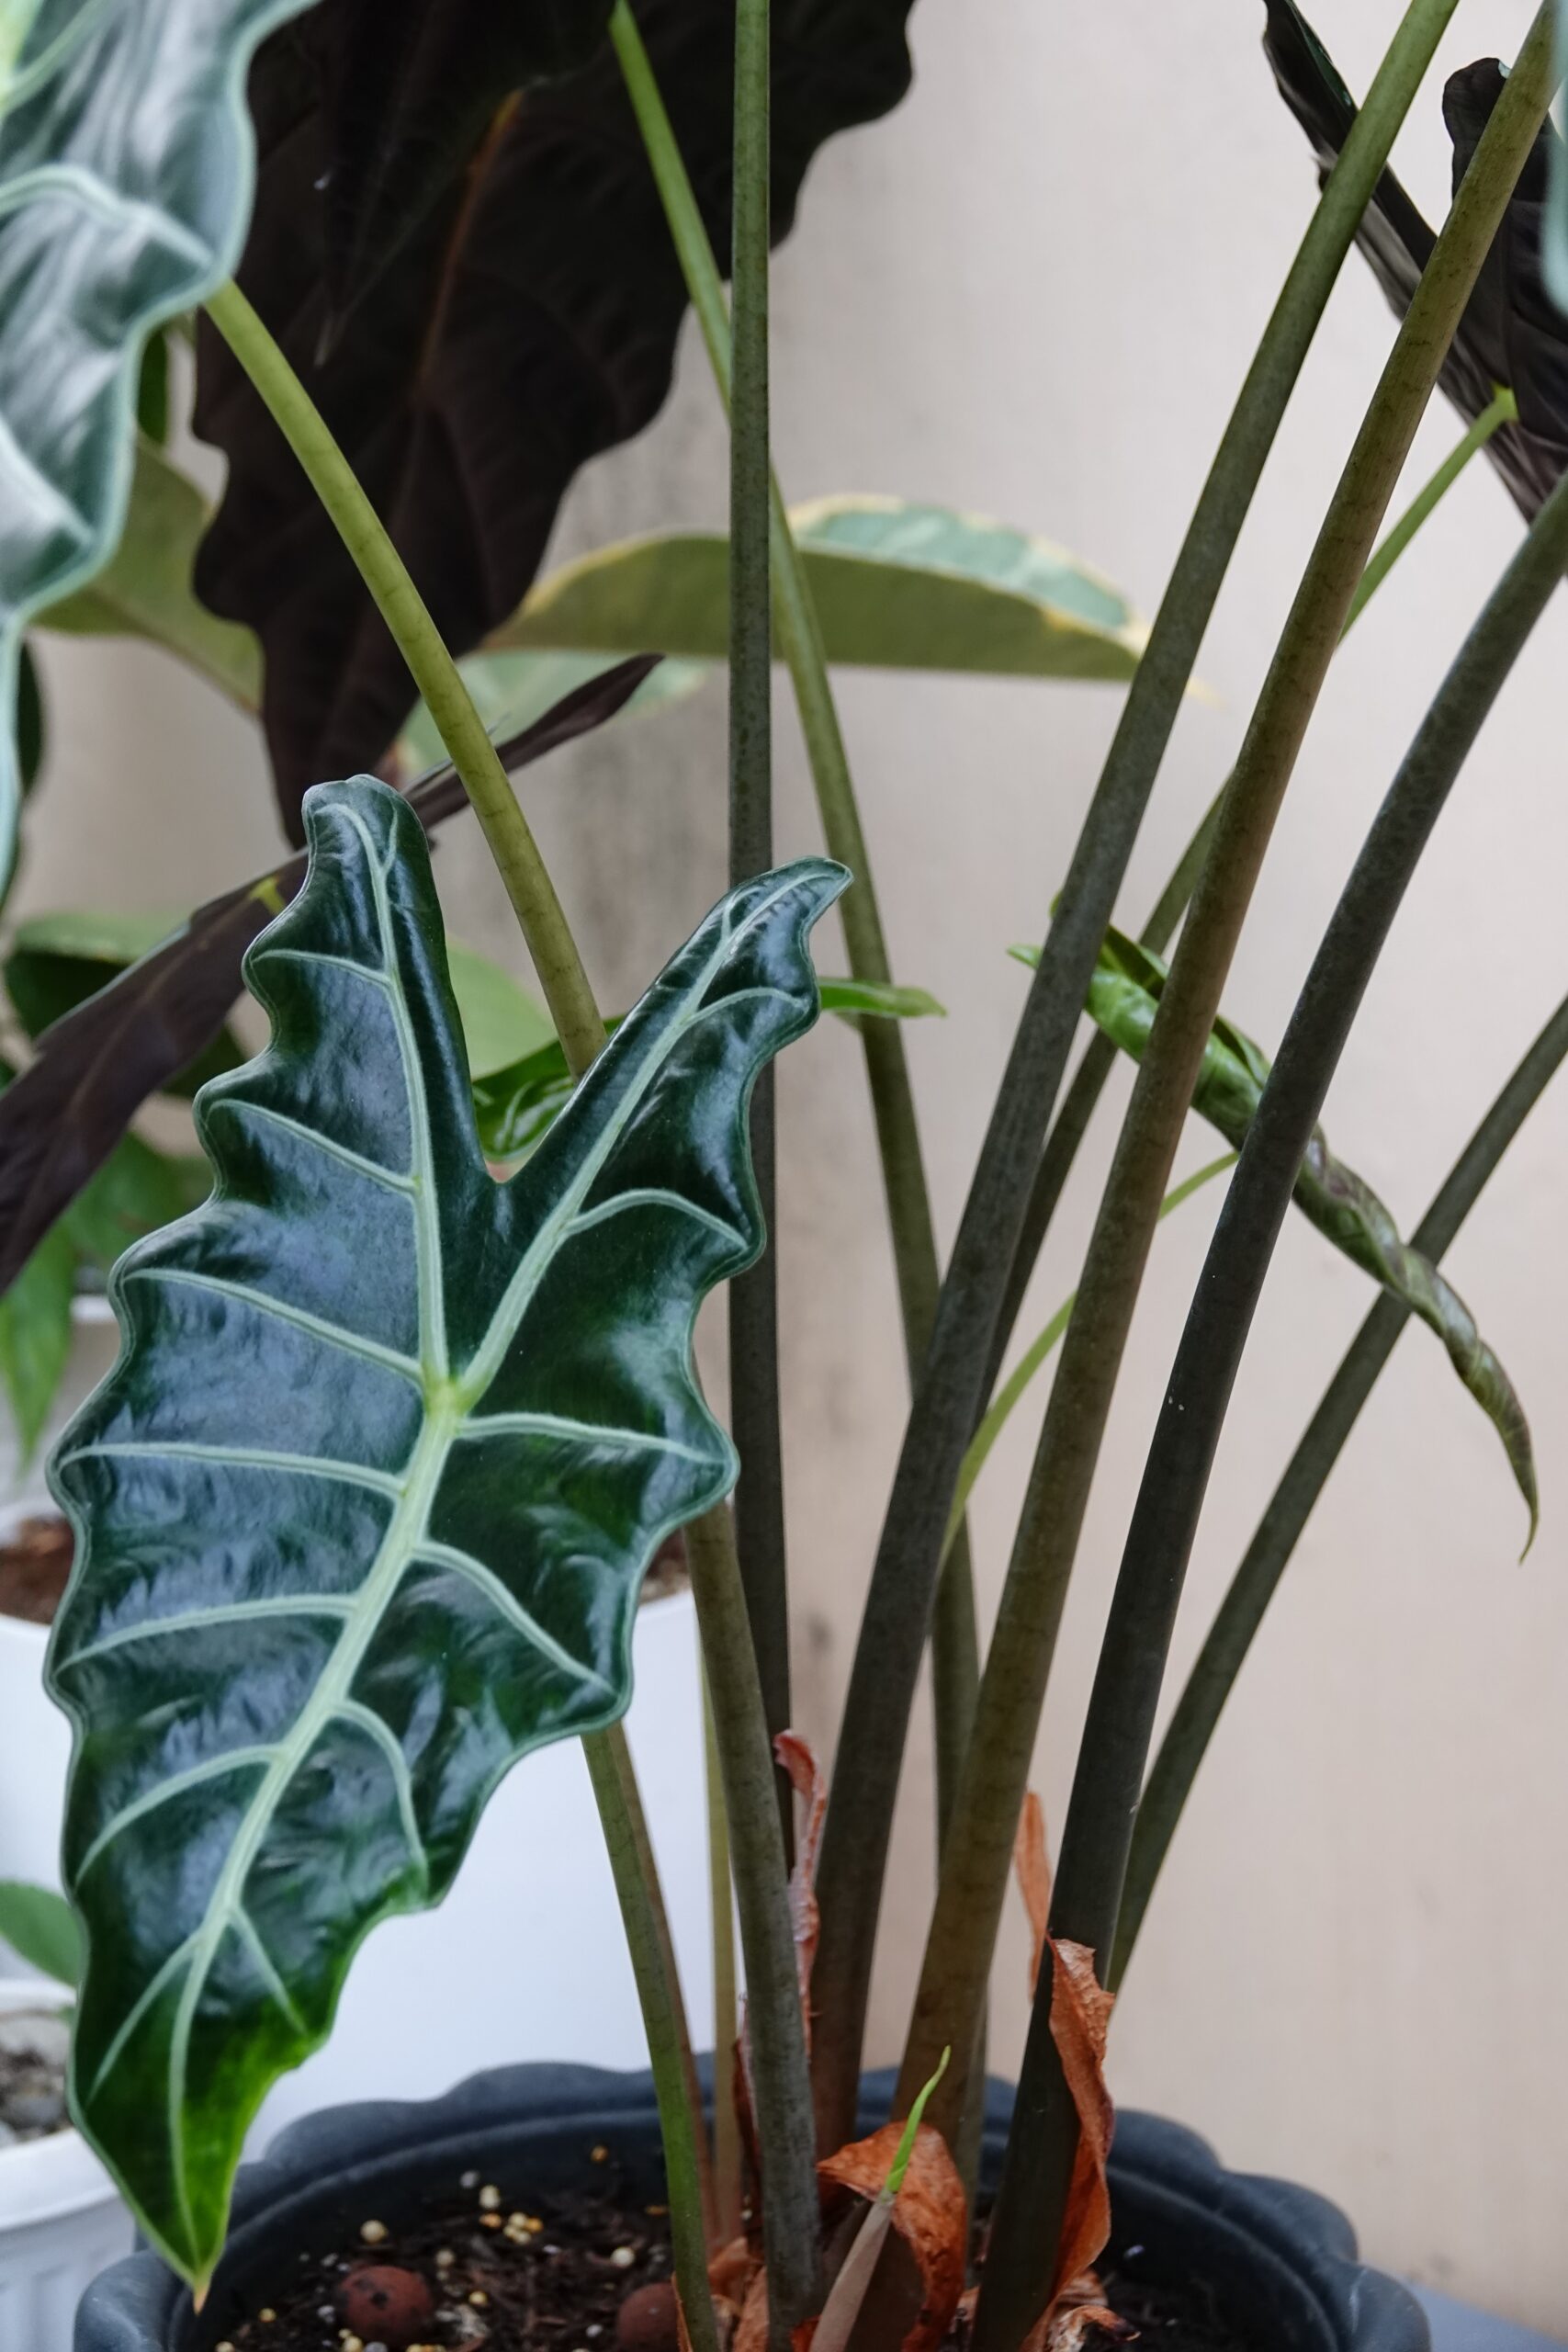
If you’re an indoor gardening enthusiast, you might be familiar with Alocasia Polly plants. These beautiful plants are easy to care for and add an attractive touch to any indoor space. But did you know that propagating new Alocasia Polly plants is also easy and can be done right at home? Propagation is the process of creating new plants from existing ones, and it’s an essential part of plant care and maintenance. Here’s what you need to know about Alocasia Polly plant propagation.
What is Plant Propagation?
Plant propagation involves creating new plants from existing ones. There are various propagation methods, including division, offsets, and stem cuttings. Propagation is useful for plants that are slow-growing or difficult to find, as it allows you to create new plants with the same characteristics as the original.
Alocasia Polly Propagation
When it comes to Alocasia Polly propagation, there are several methods you can use. The most common methods are division, offsets, and stem cuttings. Each method has its advantages and challenges, but all are relatively easy to do with some basic knowledge and preparation.
Division involves separating the parent plant into smaller sections and planting them separately. Offsets are small plants that grow from the main stem of the parent plant and can be separated and replanted. Stem cuttings involve taking cuttings of the stem and rooting them to create new plants.
Propagation is an excellent way to expand your Alocasia Polly collection or share your plants with others. Additionally, it’s a rewarding way to connect with nature and learn more about plant care and maintenance.

How to Propagate Alocasia Polly
Before jumping into the process of propagating Alocasia Polly, it is important to properly prepare to ensure success. Taking the time to gather the necessary tools and materials, choosing the right time for propagation, and creating a suitable environment can all make a significant difference in the outcome of your propagation efforts.
Here are some steps to follow when preparing for Alocasia Polly propagation:
- Gather the necessary tools and materials: You will need a clean and sharp knife or scissors, a suitable potting mix, rooting hormone (if desired), and suitable containers for planting.
- Choose the right time for propagation: The best time to propagate Alocasia Polly is during the growing season in spring or summer.
- Create a suitable environment: Alocasia Polly prefers warm and humid conditions, so consider using a propagation tray with a clear lid to maintain moisture levels. Place the tray in a bright, indirect light location that provides consistent warmth and humidity.
Proper preparation is crucial for the success of your propagation efforts. Take the time to gather the necessary tools and materials, choose the right time for propagation, and create a suitable environment. These steps will help ensure that your newly propagated Alocasia Polly plants thrive in their new environment.
Method 1: Propagating Alocasia Polly through Division
Propagating Alocasia Polly through division is a straightforward process that allows you to create new plants while also controlling the size of your existing plant. Follow these easy steps to divide your Alocasia Polly:
- Water your Alocasia Polly plant well the day before you plan to divide it.
- Remove the plant from its pot and gently shake off any loose soil.
- Inspect the rhizome (the underground stem from which the roots grow) and identify areas of the plant that have multiple stems growing out of a single rhizome.
- Carefully use a sharp, clean knife or pair of scissors to separate these sections, making sure each division has at least one healthy stem and root system.
- Repot each division in a suitable container with fresh, well-draining soil.
- Water the newly potted divisions and place them in a warm, bright area with indirect sunlight.
It’s important to note that when dividing your Alocasia Polly, each section should have its own set of roots and stems to ensure successful growth. Avoid dividing the plant into sections that are too small, as this can lead to stunted growth or failure.
Division is a reliable method of propagating Alocasia Polly because each new plant is an exact clone of the parent plant. This method is best done in the spring or early summer when the plant is actively growing.
Tip: Division is also an excellent way to keep your Alocasia Polly plant from outgrowing its pot and becoming root-bound.
Method 2: Propagating Alocasia Polly through Offsets
If you’re looking for an easy way to propagate Alocasia Polly, using offsets is a great method to start with. Offsets are small plants that grow off the mother plant and can be separated and planted on their own, allowing for new Alocasia Polly plants to thrive.
To propagate Alocasia Polly with offsets, the first step is to identify the offset. Look for small plants growing off the parent plant with their own roots and leaves. Once you’ve located the offset, gently remove it from the parent plant.
Next, prepare a pot filled with well-draining soil and plant the offset at a similar depth to where it was previously growing on the parent plant. Water the soil thoroughly, then place the pot in a bright, warm spot with partial shade.
It’s important to keep the soil moist but not waterlogged during the first few weeks after planting. As the new plant grows, you can gradually decrease the frequency of watering. Keep an eye on the leaves to ensure they’re not wilting, which could be a sign of under or over-watering.
Propagation with offsets can produce new Alocasia Polly plants relatively quickly, often within a few months. Keep in mind that it’s essential to wait until the new plant has achieved a similar size to the parent plant before repotting or transplanting.
Method 3: Propagating Alocasia Polly through Stem Cuttings
Propagating Alocasia Polly through stem cuttings is another easy way to expand your indoor garden. This method involves taking cuttings from the parent plant and rooting them to produce new plants. This approach can be used in combination with the division method to propagate several plants from a single parent Alocasia Polly.
Before you start: Ensure that you use sharp and sterile tools to avoid damaging the parent plant or introducing diseases or pests to the cuttings.
Steps to Propagate Alocasia Polly through Stem Cuttings
| Step | Description |
|---|---|
| Step 1 | Identify a healthy shoot on the parent plant that has at least one leaf and one node (the point on the stem where a leaf emerges). |
| Step 2 | Use pruning shears to cut off the shoot just below the node. |
| Step 3 | Remove the lower leaves from the cutting, leaving only one or two leaves at the top. |
| Step 4 | Dip the cut end of the stem into rooting hormone to encourage root growth. |
| Step 5 | Plant the cutting in a pot that contains moist potting mix and cover it with a plastic bag or a clear plastic container to create a humid environment. |
| Step 6 | Place the pot in a bright location without direct sunlight and maintain a temperature of around 70°F. |
| Step 7 | Check the moisture level of the potting mix regularly and water as needed to keep it moist but not waterlogged. |
| Step 8 | After a month or two, the cutting should develop roots and new growth. Once the new plant has established, transplant it into a new pot with fresh potting mix. |
Tip: When using stem cuttings for propagation, it’s a good idea to take multiple cuttings to increase the chances of success.
Propagating Alocasia Polly through stem cuttings can be a simple and fun way to grow your indoor garden. With proper care, the new plants will thrive and add beauty to your living space.
Caring for Alocasia Polly Cuttings or Divisions
Once you have successfully propagated your Alocasia Polly cuttings or divisions, it’s crucial to provide them with proper care to ensure their growth and health. Follow these guidelines to keep your plants thriving:
- Watering: Alocasia Polly plants prefer consistently moist soil, so make sure to water them regularly. However, be cautious not to overwater them, as this can lead to root rot. Allow the top inch of soil to dry out before watering again.
- Light requirements: Alocasia Polly plants thrive in bright, indirect light. Keep them near a window that receives plenty of sunlight, but avoid placing them in direct sunlight as it can scorch their leaves.
- Temperature: Alocasia Polly plants prefer warm temperatures, ideally between 60°F and 80°F. Ensure they are not exposed to any cold drafts or temperature fluctuations.
- Humidity: Alocasia Polly plants prefer high humidity levels. Place a humidifier near your plants, or mist them regularly to maintain the ideal moisture levels.
Additionally, be mindful of any signs of stress or disease in your propagated Alocasia Polly plants. Look out for yellowing leaves, brown spots, or wilting, and take necessary action to address the issue promptly.
With proper care and attention, your propagated Alocasia Polly plants will thrive and add a touch of natural beauty to your indoor space.
Troubleshooting Common Propagation Issues
Propagating Alocasia Polly can be a rewarding experience, but it’s not always smooth sailing. Like any plant propagation, issues can arise along the way. Don’t worry, though. Below are some common propagation problems and how to overcome them.
Root Rot
Root rot is a fungal disease that affects the roots of the plant. If you notice your cuttings or divisions starting to wilt or turn brown, it may be a sign of root rot. To fix this issue, you’ll need to remove the affected part of the plant and ensure it’s not overwatered. In the future, make sure to provide well-draining soil and allow the soil to dry out between watering.
Pests
Pests such as spider mites and mealybugs can pose a threat to your propagated Alocasia Polly. If you notice any signs of pests, such as webs or discolorations, you will need to take action to eliminate them. You can use insecticidal soap, rubbing alcohol, or neem oil to get rid of pests. Be sure to follow the product instructions carefully and apply it to the affected areas.
Wilting
Wilting may occur if your propagated Alocasia Polly is not getting enough water or if the environment is too dry. To solve this problem, make sure to water the plant regularly and maintain the appropriate humidity levels. You can also mist the plant or use a humidifier to provide a suitable environment for the plant to thrive.
With these tips and tricks, you should be able to troubleshoot any propagation problems that may arise. Be patient and persistent, and you’ll have a thriving Alocasia Polly plant in no time.

Propagation Success Tips for Alocasia Polly
Propagating Alocasia Polly can be a fulfilling experience, especially when you achieve a high success rate. Here are some tips to increase your chances of successful propagation:
- Use rooting hormones: Applying rooting hormones to your cuttings can promote growth and speed up the rooting process.
- Maintain proper hygiene: Keep your tools and workspace clean to avoid introducing harmful bacteria or fungi to your cuttings.
- Monitor progress: Keep track of your propagated plants’ growth and adjust their care as needed. This will help prevent potential problems and maintain healthy growth.
- Choose the right time: Timing is crucial to successful propagation. Choose a time when your plant is in its active growth phase and has the best chance of producing healthy cuttings.
- Provide optimal growing conditions: Ensure your cuttings are in the ideal environment for successful rooting. This includes providing adequate light, temperature, and humidity.
By following these tips, you can increase your chances of successful propagation and watch as your Alocasia Polly plants flourish. Happy propagating!
Potting and Transplanting Propagated Alocasia Polly Plants
Congratulations, you have successfully propagated your Alocasia Polly plant! The next step is to pot and transplant the newly propagated plants, which will ensure their continued growth and health.
First, select an appropriate pot size that allows for at least an inch of space between the plant and the edge of the pot. Ensure the pot has good drainage to prevent waterlogging and root rot.
Next, prepare the potting mix by combining equal parts of perlite, peat moss, and vermiculite. This mixture provides excellent drainage while retaining moisture and nutrients for the plants.
Carefully remove the propagated Alocasia Polly plants from their original containers or divided sections, taking care not to damage their roots.
Place the plants in the new pots, ensuring they are centered and at the same depth as they were previously. Fill the remaining space in the pot with the potting mix, gently pressing down to ensure the plant is secure and the soil is evenly distributed.
After potting the plants, water them thoroughly, and place them in a bright, indirect light area. Ensure your Alocasia Polly plants are receiving the right amount of water, not too much and not too little.
If you are transplanting the propagated Alocasia Polly plants outdoors, ensure that the outdoor environment is suitable for the plant. Transplant during the warm months and give the plant time to adjust to its new surroundings.
With proper potting and transplanting, your newly propagated Alocasia Polly plants will continue to thrive and provide beauty to your indoor or outdoor garden.

Maintaining Your Propagated Alocasia Polly Plants
Now that you have successfully propagated your Alocasia Polly plants, it’s time to ensure their continued health and growth. By following these maintenance tips, you can enjoy a thriving indoor garden for years to come.
Caring for Your Alocasia Polly Plants
To keep your propagated Alocasia Polly plants healthy, it’s essential to maintain their proper care. This includes:
- Watering: Alocasia Polly plants require consistently moist soil, but avoid overwatering, which can lead to root rot. Water your plants when the top inch of soil feels dry to the touch.
- Light: These plants thrive in bright, indirect light but can tolerate lower light conditions. Avoid placing them in direct sunlight, which can scorch their leaves.
- Temperature: Alocasia Polly plants prefer temperatures between 60-80°F and high humidity levels. Mist them regularly or place a humidifier nearby to create the ideal environment.
Fertilizing Your Alocasia Polly Plants
To ensure optimal growth and foliage, fertilize your Alocasia Polly plants every 2-3 weeks during the growing season (spring and summer) using a balanced liquid fertilizer. During the dormant season (fall and winter), reduce fertilization to once a month.
Pruning Your Alocasia Polly Plants
Regular pruning can help maintain the shape and health of your Alocasia Polly plants. Remove any dead or yellowing leaves and trim back stems that have become too long or leggy.
Providing an Ideal Environment
In addition to proper care, it’s important to provide an ideal environment for your Alocasia Polly plants. This includes:
- Potting: Choose a pot with drainage holes and fill it with well-draining soil, such as a mix of peat moss, perlite, and vermiculite.
- Transplanting: As your plants grow, they may outgrow their current pots. Transplant them into slightly larger pots, being careful not to damage their delicate roots.
- Avoiding drafts: Alocasia Polly plants are sensitive to temperature changes and drafts. Keep them away from vents, doors, and windows that may cause sudden changes in temperature.
Conclusion
Congratulations! You’ve learned how to propagate Alocasia Polly plants in the comfort of your own home. Not only is this an easy and fun process, but it also has many benefits for your indoor garden. Whether you choose to propagate through division, offsets, or stem cuttings, the steps are straightforward and achievable.
Remember to prepare adequately before starting, gathering the necessary tools and ensuring the right environment. Once you’ve successfully propagated your Alocasia Polly plants, be sure to care for them properly with regular watering, fertilization, and pruning. Don’t forget that maintaining a suitable environment is key to the success of your indoor garden.
Keep Learning and Experimenting
By propagating Alocasia Polly plants, you’ve taken the first step towards becoming a successful gardener and creating a thriving indoor garden. Continue to learn and experiment with different techniques and plants. With time and practice, you’ll gain the confidence and expertise to take on more challenging propagation projects.
Enjoy the beauty and benefits that your propagated Alocasia Polly plants bring to your home. Happy gardening!