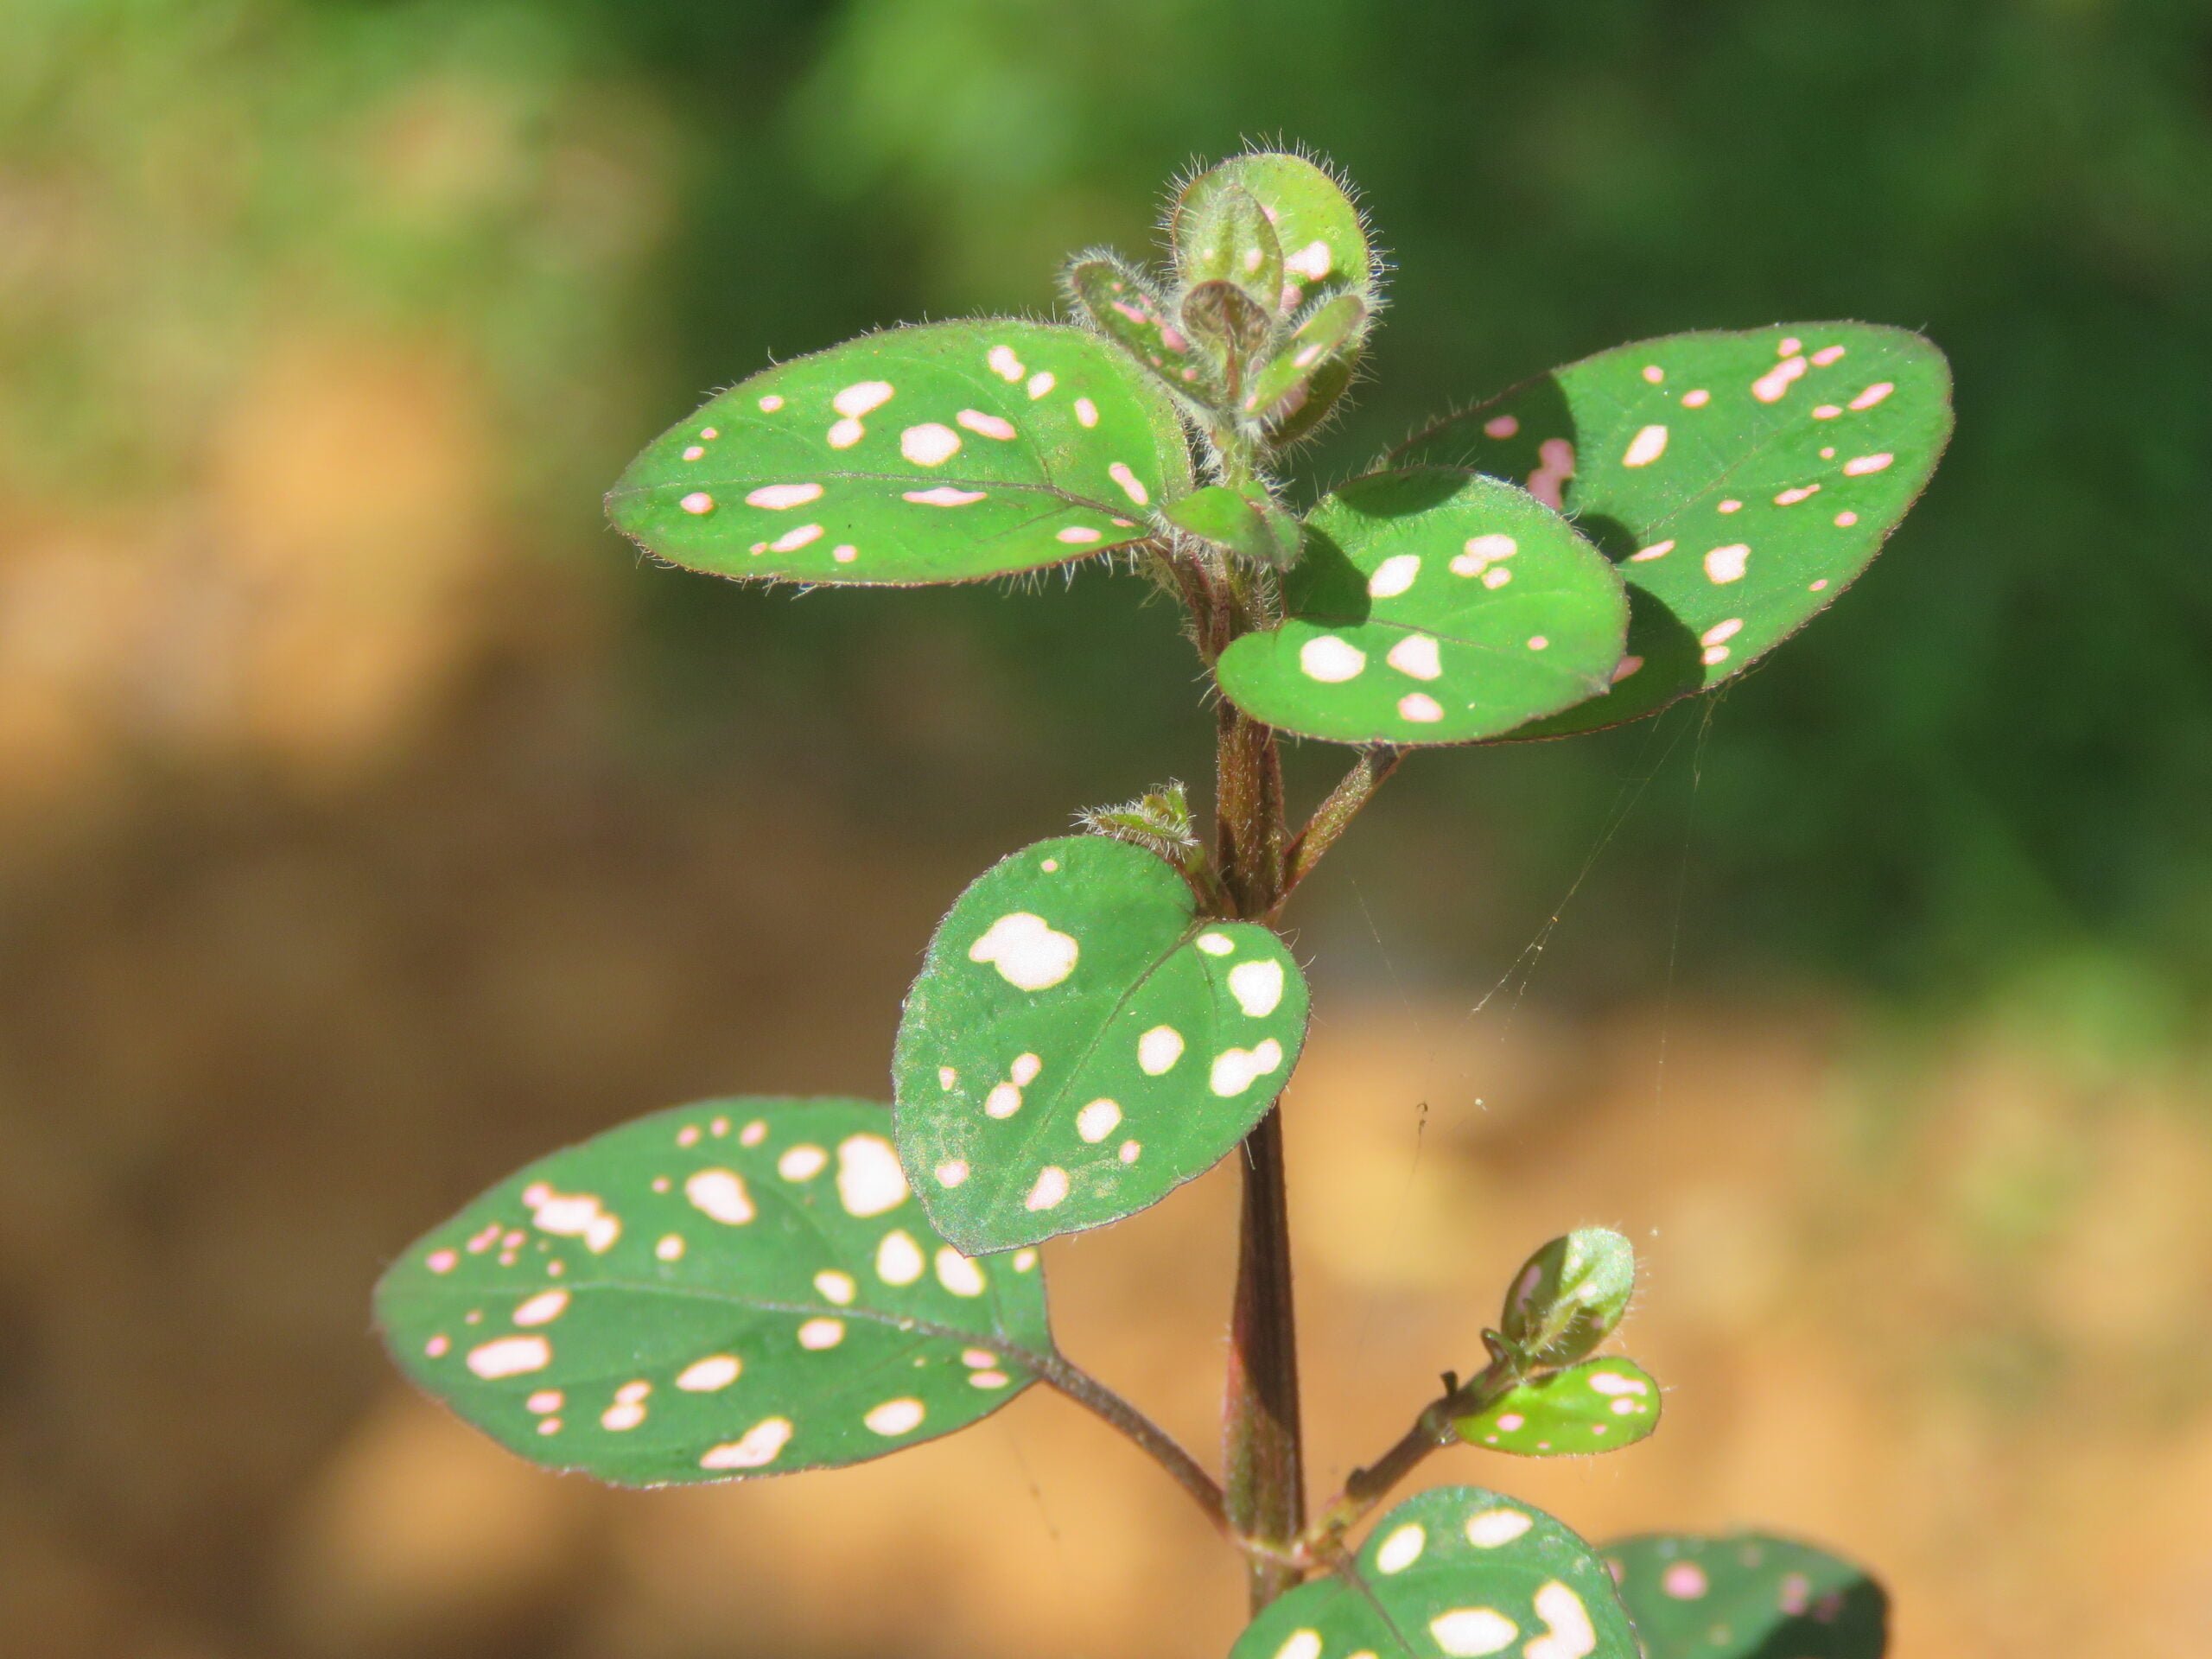
Learning how to propagate a polka dot plant is an essential skill for any plant enthusiast. Propagating a polka dot plant means creating new plants from existing ones without the need for seeds. This process ensures that you can enjoy an abundance of beautiful polka dot plants without having to spend a lot of money. In this guide, we will take you step-by-step through the different plant propagation methods and give you tips on how to care for your newly propagated polka dot plants.
Before we get started, let’s take a closer look at what polka dot plant propagation is all about. Propagating a polka dot plant involves taking cuttings from a healthy mother plant and rooting those cuttings to create new plants. This can be done using different plant propagation techniques, including rooting a polka dot plant in water or soil. The key to successful polka dot plant propagation is to choose the right time, tools, and method for your specific plant.
Throughout this guide, we will touch on different aspects of polka dot plant care to ensure that your newly propagated plants thrive. From understanding how to encourage polka dot plants to grow to caring for leggy plants, we’ve got you covered. Let’s begin our journey into the world of polka dot plant propagation!
So, without further ado, let’s dive into the different plant propagation methods and techniques you can use to start propagating your own polka dot plants.

How to Propagate a Polka Dot Plant
Propagating a polka dot plant is an excellent way to grow new plants at no cost. Understanding the propagation process can help you achieve success and increase your plant collection. One of the best ways to propagate a polka dot plant is through stem cuttings.
Plant propagation involves reproducing plants by taking parts from a parent plant and using them to create new plants. There are several plant propagation techniques, but stem cuttings are one of the easiest and most successful ways to propagate a polka dot plant. Cuttings are taken from the parent plant and placed in a growing medium until roots form, producing a new plant.
Growing polka dot plants from cuttings is simple. The cuttings should be between 4-6 inches long and have at least two pairs of leaves. The cutting should be taken from a healthy parent plant, and the leaves should be removed from the bottom section of the stem, leaving only the top two pairs of leaves.
Tip:To ensure success, take cuttings in the morning when the plant is well-hydrated
Once the cutting is taken, it should be inserted into a growing medium like soil or water. The cutting should be watered regularly, and it will start to develop roots in a few weeks.
Overall, polka dot plant propagation through stem cuttings is relatively easy and does not require any special skills. It is a great way to expand your polka dot plant collection, and with a little care and attention, you can enjoy many new plants.
Choosing the Right Time and Tools for Propagation
The key to successful polka dot plant propagation is to choose the right time and tools for the job. This section will discuss the best times to propagate your plant and the tools you will need to get the job done.
When to Propagate
The best time to propagate a polka dot plant is during its active growth phase, which is typically in the spring and summer months. During this time, the plant will be actively producing new growth, which means that it will be more receptive to propagation techniques.
It’s important to wait until the plant is large enough to handle propagation. If the plant is too small, it may not have enough energy to recover from the stress of propagation. However, if the plant is too large, it may be more difficult to handle and may require more attention to ensure successful rooting.
Tools for Propagation
You will need a few tools to successfully propagate a polka dot plant. These tools include:
- Sharp scissors or pruners: You will need sharp scissors or pruners to take cuttings from the plant.
- A rooting hormone: A rooting hormone can be applied to the cuttings to encourage root growth.
- A propagation medium: You will need a propagation medium, such as perlite or vermiculite, to root your cuttings.
- A propagation container: A propagation container, such as a small pot or tray, will be needed to hold the propagation medium and cuttings.
- A misting bottle: A misting bottle can be used to keep the cuttings moist and encourage root growth.
By using the right tools and waiting until the optimal time, you can increase your chances of successfully propagating your polka dot plant.

Taking Cuttings from a Polka Dot Plant
Propagating a polka dot plant is an easy and cost-effective way to expand your indoor garden collection. One of the most popular methods of propagating this plant is through stem cuttings. Here is a step-by-step guide on how to take cuttings from a polka dot plant:
How do you encourage a polka dot plant to grow?
Before taking cuttings from a polka dot plant, it’s important to ensure the mother plant is healthy and actively growing. You can encourage healthy growth by providing the plant with proper nutrients, watering it regularly, and placing it in bright, indirect sunlight.
Where do you cut a polka dot plant?
Take a close look at the polka dot plant and identify a section of the stem that has several leaves and nodes. Nodes are the small bumps on the stem from which leaves and roots grow. Using a clean and sharp pair of scissors or pruning shears, cut the stem just below a node.
Can you propagate a polka dot plant in water?
Yes, you can propagate a polka dot plant in water. After taking a cutting, remove the lower leaves, leaving only a few at the top. Place the cutting in a jar or vase filled with water, making sure the bottom of the stem is submerged. Change the water every few days to prevent bacterial growth and encourage root development.
| Step | Instructions |
|---|---|
| 1 | Prepare a container filled with a well-draining potting mix. |
| 2 | Dip the cut end of the stem in rooting hormone powder to encourage root growth. |
| 3 | Make a small hole in the potting mix and insert the stem cutting. |
| 4 | Water the potting mix thoroughly and place the pot in a warm and bright location, but away from direct sunlight. |
With proper care, your polka dot plant cutting should develop roots within a few weeks and start growing into a new plant.
Rooting Polka Dot Plant Cuttings
Once you have taken cuttings from your polka dot plant, it’s time to root them in order to grow new plants. Here are some tips to successfully root your cuttings:
How do you propagate polka dot plant nodes?
Nodes are the parts of the stem where leaves grow. In order to propagate a polka dot plant from nodes, you need to cut the stem just below a node and remove the lower leaves. Place the stem in water or moist soil, and wait for roots to grow.
Can polka dot plant grow in water?
Yes, polka dot plants can be grown in water. Simply place the stem in a jar or vase filled with water, making sure that the lower leaves are not submerged. Change the water every few days to prevent it from becoming stagnant and promote root growth.
Should polka dot plants be grown indoors or outdoors?
Polka dot plants can be grown both indoors and outdoors, depending on the climate and personal preferences. Indoors, they prefer bright, indirect light and moderate humidity. Outdoors, they can be grown in partial shade and moist soil.
Caring for Newly Propagated Polka Dot Plants
Once you have successfully propagated your polka dot plant, it’s important to take proper care of the newly propagated plants. This will help ensure they grow strong and healthy.
Polka dot plant care: When caring for your propagated polka dot plants, it’s important to keep in mind that they require the same care as mature plants. This includes providing them with the right amount of light, water, and nutrients.
Polka dot plant leggy: If your newly propagated polka dot plants start to become leggy (meaning they grow tall and thin), it’s likely they are not getting enough light. Move them to a brighter location or provide supplemental lighting.
Polka dot plant node: When your polka dot plant cuttings start to grow new leaves, it’s important to take note of where the nodes (points where the leaves attach to the stem) are located. These nodes are where new growth will emerge and should be kept above the soil level when repotting.

Troubleshooting Common Polka Dot Plant Propagation Problems
Polka dot plant propagation is a simple process, but there are potential problems that can hinder your success. Here are some common issues and tips for troubleshooting:
| Problem | Solution |
|---|---|
| The cutting is not rooting | Make sure you are using a healthy stem with at least one leaf node. Ensure the soil is moist but not soggy, and avoid direct sunlight which can dry out the soil. Try using a root hormone to encourage growth. |
| The cutting is rotting | This can occur if the soil is too moist, or if the cutting is not getting enough light. Ensure the soil is well-draining and let it dry out slightly between watering. Place the cutting in a bright, indirect light location. |
| The plant is leggy | This can happen if the plant is not getting enough light. Move it to a brighter location or provide artificial light if necessary. Additionally, make sure the plant is not getting too much fertilizer, as this can cause leggy growth. |
Overall, it’s important to be patient and consistent with your polka dot plant propagation efforts. Remember to use healthy cuttings, provide proper lighting and watering, and avoid over-fertilizing. With time and care, you can successfully propagate your polka dot plant and expand your collection.
Tip: If you’re experiencing repeated failures with polka dot plant propagation, try experimenting with different soil types, rooting hormones, and cutting techniques to find what works best for you.
Repotting and Transplanting Propagated Polka Dot Plants
After successfully propagating your polka dot plant, it’s essential to repot it into a larger container to provide the necessary nutrients for further growth. The following are the steps to follow when repotting your polka dot plant:
- Choose a pot that is about 2-3 inches larger in diameter than the current one.
- Fill the bottom of the new pot with soil, and then gently remove the plant from the old pot.
- Loosen the soil around the roots of the plant, making sure not to damage them.
- Place the plant in the new pot and fill around it with soil, tamping it down gently to remove any air pockets.
- Water the plant thoroughly, making sure the soil is evenly moist.
It’s also important to note that your newly propagated polka dot plant may need to be transplanted outdoors, depending on your climate and the size of the plant. To do so, follow these steps:
- Choose a spot that receives bright, indirect sunlight and has well-draining soil.
- Prepare the soil by loosening and adding compost.
- Remove the plant from its pot, and loosen the soil around its roots.
- Place the plant in the hole, making sure it’s at the same depth as it was in its previous pot.
- Pack the soil around the plant, tamping it down gently, and water it thoroughly.
Remember, repotting and transplanting can be stressful for a young plant, so be sure to monitor it closely and provide it with the proper care to ensure it flourishes.

Propagating Polka Dot Plants: Tips and Tricks
Propagation can seem daunting, but these tips and tricks will help you successfully propagate your polka dot plant.
Tip #1: Choose Healthy Parent Plants
The success of propagation depends on the health of the parent plant. Only propagate from a healthy polka dot plant that has no signs of disease or pests.
Tip #2: Use Good Quality Soil
The right soil is essential for successful propagation. Use well-draining soil with good aeration and water retention. Adding perlite or sand to the soil mix will improve drainage.
Tip #3: Keep the Soil Moist
Moist soil provides the ideal conditions for the roots to grow. Water the soil regularly, but do not overwater. Too much water can cause the cutting to rot.
Tip #4: Provide Adequate Light
Polka dot plants require bright, indirect light. Place the propagated cuttings in a bright spot, but not in direct sunlight, as this can cause the leaves to burn.
Tip #5: Maintain a Warm Temperature
Polka dot plants thrive in warm temperatures between 60-80°F (15-26°C). Keep the propagated cuttings in a warm spot, away from cold drafts or sudden temperature changes.
Tip #6: Use Rooting Hormone
Applying rooting hormone to the cut end of the stem can speed up the rooting process. Dip the cut end in rooting hormone powder before planting it in the soil.
Tip #7: Be Patient and Don’t Disturb
Rooting and growth take time, so be patient and resist the urge to check on the cutting too often. Also, avoid disturbing the cutting by moving or repositioning it, as this can damage the new roots.
Tip #8: Experiment with Different Methods
There are various methods to propagate polka dot plants, such as stem cuttings, leaf cuttings, and division. Try different methods to find out which one works best for you and your plant.
Polka Dot Plant Propagation: Frequently Asked Questions
Propagation is an excellent way to expand your polka dot plant collection and enjoy the beauty of these colorful and vibrant plants. As with any propagation process, it’s natural to have questions and concerns. Here are some of the most frequently asked questions about polka dot plant propagation:
Can you propagate a polka dot plant in water?
Yes! Polka dot plants can be propagated in water. Simply take a cutting from the plant and place it in a glass of fresh water. Make sure to change the water every few days and keep the cutting in a bright, indirect spot. Once the roots appear, you can transplant the cutting into soil.
How do you encourage a polka dot plant to grow?
Polka dot plants thrive in bright, indirect light and humid environments. To encourage growth, provide your plant with plenty of light, keep the soil moist, and mist the leaves regularly. You can also fertilize the plant every few weeks with a balanced liquid fertilizer.
Where do you cut a polka dot plant?
When taking a cutting from a polka dot plant, it’s best to cut just below a node. A node is a small bump on the stem where the leaves and roots grow. By cutting just below a node, you increase the chances of the cutting developing roots and becoming a new plant.
Can polka dot plants grow indoors or outdoors?
Polka dot plants can be grown both indoors and outdoors, depending on the climate and environment. These tropical plants prefer warm, humid environments and do best in bright, indirect light. If you’re growing your polka dot plant outdoors, make sure to protect it from direct sunlight and harsh winds. If growing indoors, place your plant near a bright window with eastern or northern exposure.
How do you propagate polka dot plant nodes?
To propagate polka dot plant nodes, simply take a stem cutting and remove the leaves from the bottom half of the stem. Place the cutting in soil or water, keeping it in a bright, indirect spot. Once roots start to grow, you can transplant the cutting into soil.
What is polka dot plant care?
Polka dot plants require regular watering, bright, indirect light, and high humidity. Keep the soil evenly moist, mist the leaves regularly, and fertilize every few weeks with a balanced liquid fertilizer. Pruning can also help keep your plant healthy and bushy.
Why is my polka dot plant leggy?
A leggy polka dot plant is a sign of insufficient light. To fix this, move your plant to a brighter location, or add artificial light. You can also pinch back the stems to encourage bushier growth.
What is a polka dot plant node?
A polka dot plant node is a small bump on the stem where the leaves and roots grow. Nodes are important for propagation because they are the areas where new roots can develop.
What are some tips for propagating a polka dot plant?
- Take stem cuttings with at least two nodes to increase your chances of success.
- Dip the bottom of each cutting in rooting hormone to encourage root growth.
- Keep your cuttings in a warm, humid environment to help them root.
- Change the water or soil regularly to prevent bacterial growth.
- Patience is key! Polka dot plant cuttings can take several weeks to root and develop into new plants.
With a little patience and care, you can propagate your own polka dot plants and enjoy their unique beauty and charm for years to come!

Conclusion
In conclusion, propagating a polka dot plant is a rewarding and exciting process that can be mastered with patience and care. Understanding the different plant propagation techniques, choosing the appropriate tools and timing, and caring for the newly propagated plant are all essential steps in the process. By following the step-by-step guide outlined in this article, one can successfully propagate a polka dot plant and ensure its long-term health and growth. Remember to troubleshoot any problems that may arise during the propagation process and be sure to repot and transplant the propagated plant when necessary. Additionally, incorporating tips and tricks into the process can help to improve the success of propagation. If any questions arise during the process of propagating a polka dot plant, refer to the frequently asked questions section of this article for further guidance. With diligent effort and attention to detail, anyone can successfully propagate a polka dot plant and enjoy its vibrant color and beauty in their home or garden.